
If you’re a coffee connoisseur, you already know that the best flavorful beans are those that have been freshly roasted. What could be more natural than roasting your own coffee? This procedure may appear intimidating, but it is actually much simpler than you might expect.
You may roast your own coffee beans in a skillet on the stove, in the oven, or in a popcorn popper. Today, we’ll go through the pan roasting approach and all of the procedures involved in roasting beans in this manner.
Essentials of Home Coffee Roasting
Before you go on your home roasting adventure, you’ll need to brush up on your coffee expertise. These five facts will assist you in comprehending what you’re about to undertake. Then we’ll go into the specifics of how to do things.
1. Ventilation
You must be able to ventilate the space where you are roasting. Use a fan or open a window to cool down your oven. During the roasting process, there will be some smoke, and setting ventilation ahead of time makes it easier to deal with.
2. Roast Temperature
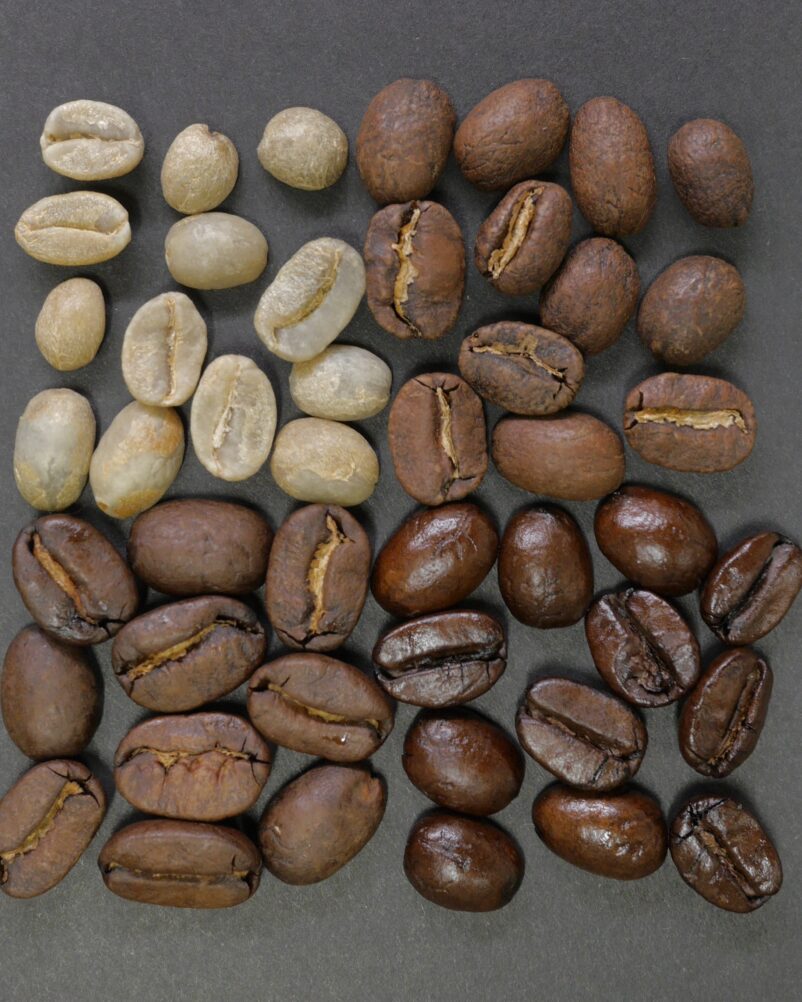
During the roasting process, look for color changes and cracks in the beans. They will begin green, then turn yellow, light brown, golden brown, and finally dark brown. The cracks that the beans make will also be visible and audible. They crack for the first time when they transition from light brown to golden brown. If you want a light roast, remove them from the heat at this point; if you want a medium roast, wait another minute.
If not, allow them to cook until they are golden brown and dark brown, at which point they will crack a second time. It will be a medium-dark to dark roast at this point. If you leave the beans on for too long after the second crack, they will develop a strong smokey flavor and taste like charcoal. Nobody wants their beans to be burnt!
Remember that the beans will continue to cook after you remove them from the heat source and allow them to cool, so keep that in mind when deciding when to remove them.
3. Chaff
Chaff is a by-product of the coffee roasting process. This is the coffee bean’s dried husk, which can be untidy. If you want to avoid a mess, chill your beans in the colander or dish outside or over the sink. Shake the beans in your colander a little harder if you’re having trouble removing the chaff. Most of it will come off on its own if there is a lot of movement.
4. Storage
Store the beans in an airtight container away from heat and light once they’ve cooled. Your beans will stay fresh for up to a month if stored this manner. But don’t wait too long – they’ll be at their freshest in the first week after roasting!
Roasting in a pan
This method is familiar because you are used to cooking with a pan. However, getting it just right might be difficult. The first few times you go through the process, you might not get a consistent roast. But don’t worry, we’re here to assist you. Depending on how much you want your beans roasted, the actual roasting will take 5 to 10 minutes.
Here are the ingredients and instructions for roasting coffee beans in a pan.
Ingredients
1/2 cup green coffee beans
Equipment
- a frying pan (cast iron is best)
- a fireplace (electric or gas)
- Colander made of metal or a bowl
- Mitts for the oven
- Spoon (wooden or metal)
Tip: Using a cast-iron pan will help you achieve the proper temperatures by generating heat faster and holding it for longer.
1. Preheat the pan over medium-high heat
Preheat the pan to 500 degrees Fahrenheit. It’s possible that you’ll need to modify the heat throughout roasting, but don’t go much higher than 500 degrees.
2. Toss in the green coffee beans
Half a cup of green coffee beans, measured and poured into the pan If you want more, increase the amount, but start small. You want to be able to simply move them around.
3. Continue to stir
Begin stirring and continue to do so as the beans cook. This ensures that the heat is distributed evenly.
4. Keep an eye out for color shifts and listen for cracks
Allow the beans to turn from green to yellow to light brown and crack for the first time. Stop roasting if you want a mild roast. Remove the beans from the pan when they get golden brown but before the second crack if you prefer a medium roast. Allow them to crack a second time before removing them from the heat for a black roast.
5. Pour into a colander or a basin
Dump the coffee beans into the metal colander or basin once the pan has been removed from the heat. To keep them from overheating, stir them around. Because the beans are still about 450 degrees, proceed with caution.
6. Let the beans de-gas for a few minutes
Allow the beans to soak for eight to 24 hours in a container with the top off. As a result, carbon dioxide is able to escape. You might be tempted to brew your aromatic beans straight immediately, but the best flavor comes from waiting. About 24 hours after roasting, your coffee will be at its most excellent.
7. Receive your treat and preserve it in an airtight container
Just before brewing, grind your beans and keep the rest in an opaque, airtight container.
Home coffee bean roasting is a unique skill that, according to those who practice it, may rapidly become addictive. Many individuals can’t go back to store-bought beans after roasting their own beans because they are so flavorful and aromatic.
Roasting coffee isn’t extremely difficult, despite the fact that it may appear such at first. We’ve shown you how to roast your own coffee at home, as well as all the knowledge you’ll need to do it correctly. Try it for yourself and learn why so many coffee lovers have begun roasting their own beans at home.